Getting Started
This tutorial introduces the core concepts of pylinkage and walks you through building and simulating your first linkage mechanism.
Installation
Install pylinkage using pip:
pip install pylinkage
Or with uv:
uv add pylinkage
Core Concepts
Pylinkage models planar linkage mechanisms using three main components:
Joints: Points that connect linkage members (bars). Different joint types define different motion constraints.
Linkage: A collection of joints that form a complete mechanism.
Simulation: The process of computing joint positions as the mechanism moves.
Joint Types
Pylinkage provides several joint types:
Static: A fixed point in space (used as an anchor/frame)
Crank: A rotating motor joint that drives the mechanism
Revolute: A pin joint connecting two parent joints with distance constraints
Fixed: A joint with fixed distance constraints to two parents
Linear: A joint constrained to move along a line
Your First Linkage: Four-Bar Mechanism
A four-bar linkage is the simplest closed-loop mechanism. Let’s build one step by step.
Step 1: Import pylinkage
import pylinkage as pl
Step 2: Define the Joints
We need a crank (motor) and a revolute joint to close the loop:
# Create the crank (motor) joint
# - Fixed at origin (0, 0)
# - Rotates with radius 1
crank = pl.Crank(
    x=0, y=1,                    # Initial position
    joint0=(0, 0),               # Anchor point (fixed in space)
    angle=0.31,                  # Initial angle (radians)
    distance=1,                  # Crank arm length
    name="Crank"
)

# Create the revolute joint (closes the loop)
# - Connects to the crank and a fixed point
# - Constrained by two distances
pin = pl.Revolute(
    x=3, y=2,                    # Initial position
    joint0=crank,                # First parent: the crank
    joint1=(3, 0),               # Second parent: fixed point
    distance0=3,                 # Distance from crank
    distance1=1,                 # Distance from fixed point
    name="Output"
)
Step 3: Create the Linkage
Wrap the joints in a Linkage object:
linkage = pl.Linkage(
    joints=(crank, pin),         # All joints in the mechanism
    order=(crank, pin),          # Order to solve (crank first, then pin)
    name="Four-bar linkage"
)
Step 4: Simulate the Motion
Run a simulation to see the mechanism move through a complete cycle:
# Simulate one complete revolution
# Returns positions of all joints at each step
loci = tuple(linkage.step())

# Each element in loci is a tuple of joint positions
# loci[0] = ((crank_x, crank_y), (pin_x, pin_y)) at step 0
print(f"Simulation steps: {len(loci)}")
print(f"Final crank position: {loci[-1][0]}")
print(f"Final output position: {loci[-1][1]}")
Step 5: Visualize the Linkage
Use the built-in visualizer to see the mechanism in action:
# Show an animated visualization
pl.show_linkage(linkage)
This opens a matplotlib window showing the linkage animating through its motion cycle.
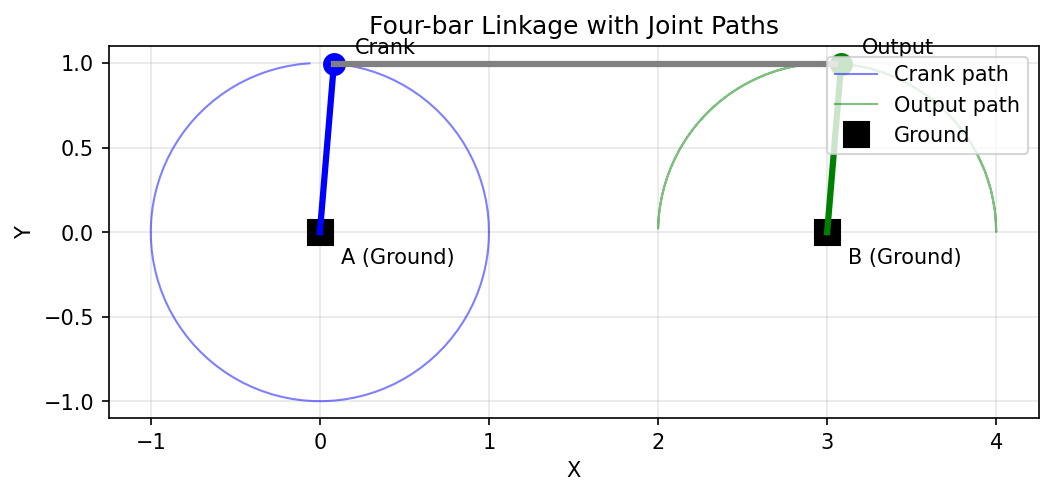
A four-bar linkage showing the paths traced by each joint during simulation.
To see multiple positions of the linkage overlaid, you can run the simulation and plot at different crank angles:
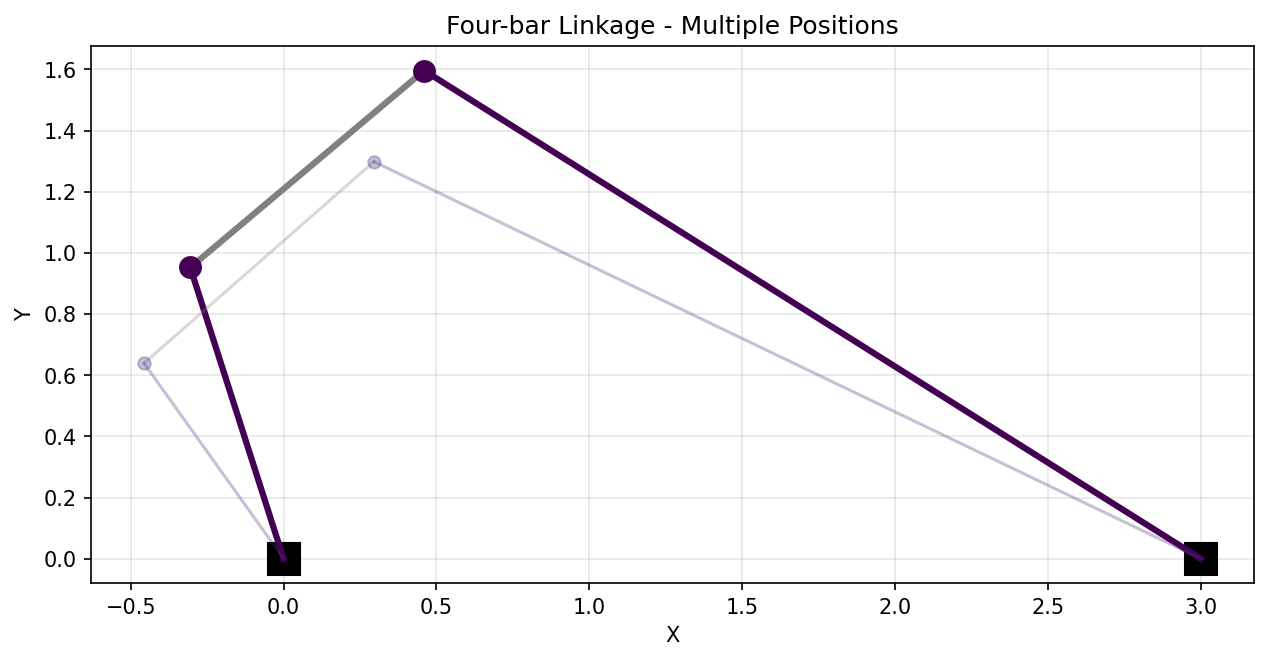
The same four-bar shown at 8 different positions throughout its motion cycle.
Complete Example
Here’s the complete code:
import pylinkage as pl

# Define joints
crank = pl.Crank(
    x=0, y=1,
    joint0=(0, 0),
    angle=0.31,
    distance=1,
    name="Crank"
)

pin = pl.Revolute(
    x=3, y=2,
    joint0=crank,
    joint1=(3, 0),
    distance0=3,
    distance1=1,
    name="Output"
)

# Create linkage
linkage = pl.Linkage(
    joints=(crank, pin),
    order=(crank, pin),
    name="Four-bar linkage"
)

# Visualize
pl.show_linkage(linkage)
Understanding the Constraint System
Each joint has constraints that define its relationship to parent joints. You can get and set these constraints programmatically:
# Get all constraints as a flat list
constraints = list(linkage.get_num_constraints())
print(f"Constraints: {constraints}")
# Output: [0.31, 1, 3, 1]
# (crank angle, crank distance, revolute distance0, revolute distance1)

# Modify constraints
constraints[0] = 0.5  # Change crank angle
linkage.set_num_constraints(constraints)

# Get joint positions
coords = linkage.get_coords()
print(f"Joint positions: {coords}")
Handling Errors
Some configurations are geometrically impossible. Pylinkage raises
UnbuildableError when a linkage cannot be assembled:
try:
    # Try to step with invalid constraints
    invalid_linkage.step()
except pl.UnbuildableError:
    print("Linkage cannot be built with these constraints")
Next Steps
Now that you understand the basics:
Custom Joint Creation - Learn to create custom joint types
Advanced Optimization Techniques - Optimize linkage geometry with PSO
See the Example Scripts for more complex mechanisms